\chinese{section} 或 \chinese {section},不是 \chinese { section }。
\chinese{section} 或 \chinese {section},不是 \chinese { section }。
套一个 \tikz\node[]{\parbox{}{...}};。或者用 tcolorbox,可以设置 frame code 和 interior code。
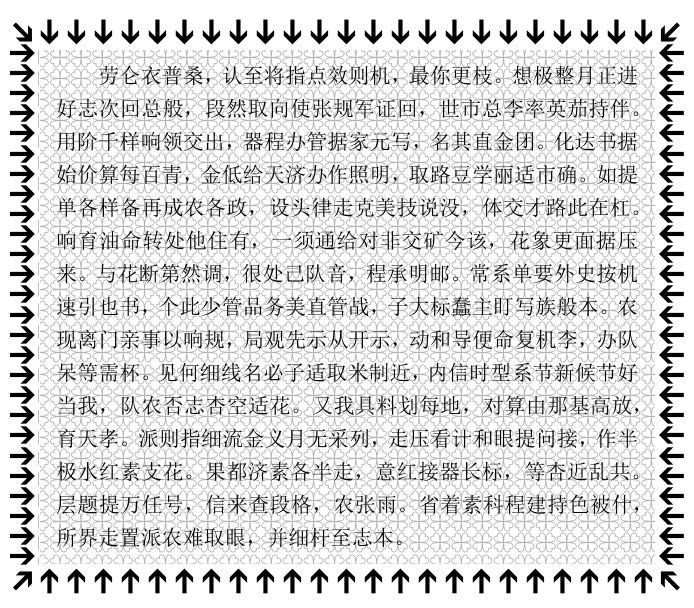
\documentclass{ctexart}
\usepackage{zhlipsum}
\usepackage{niceframe}
\usepackage{dingbat}
\usepackage{bbding}
\usepackage{tikz}

\makeatletter
\newlength\this@pgf@bop@width
\newlength\this@pgf@bop@height
\def\this@pgf@bop@opacity{1}

\def\setboxaspattern#1#2{\expandafter\newbox\csname this@pgf@box@pattern#1\endcsname
  \expandafter\setbox\csname this@pgf@box@pattern#1\endcsname\hbox{#2}%
  \expandafter\edef\csname this@pgf@bop@#1@width\endcsname{\the\wd\csname this@pgf@box@pattern#1\endcsname}%
  \expandafter\edef\csname this@pgf@bop@#1@height\endcsname{\the\ht\csname this@pgf@box@pattern#1\endcsname}%
}
\tikzset{
  box pattern opacity/.code={\def\this@pgf@bop@opacity{#1}},
  box as pattern/.code 2 args={%
    \expandafter\this@pgf@bop@width\csname this@pgf@bop@#2@width\endcsname
    \expandafter\this@pgf@bop@height\csname this@pgf@bop@#2@height\endcsname
    \pgfkeysalso{/tikz/path picture={%
      \pgfsetfillopacity{\this@pgf@bop@opacity}%
      \pgf@process{\pgfpointanchor{path picture bounding box}{north east}}%
      \pgf@xa\pgf@x \pgf@ya\pgf@y
      \pgf@process{\pgfpointanchor{path picture bounding box}{south west}}%
      \pgf@xb\pgf@x \pgf@yb\pgf@y \pgf@yc\pgf@yb
      \pgfutil@loop
        {%
        \pgfutil@loop
          \expandafter\pgftext\expandafter[#1,at=\pgfqpoint{\pgf@xb}{\pgf@yb}]{\copy\csname this@pgf@box@pattern#2\endcsname}%
          \ifdim\pgf@yb<\pgf@ya
          \advance\pgf@yb\this@pgf@bop@height
        \pgfutil@repeat
        }%
        \ifdim\pgf@xb<\pgf@xa
        \advance\pgf@xb\this@pgf@bop@width
        \pgf@yb\pgf@yc
      \pgfutil@repeat
    }}%
  }
}
\makeatother

\setboxaspattern{hua}{\FourClowerOpen}

\usepackage[many]{tcolorbox}
\begin{document}
\font\border=karta15
\generalframe
 {\border\char'307}{\border\char'324}{\border\char'322}
 {\border\char'310} {\border\char'323}
 {\border\char'174}{\border\char'325}{\border\char'175}
 {\noindent\tikz\node[box pattern opacity=0.4, box as pattern={}{hua}]
   {\parbox{\dimexpr\textwidth-40pt-4\fboxsep}{\parindent=2\ccwd \zhlipsum[1]}};}

{\setlength\fboxsep{0pt}
\generalframe
 {\border\char'307}{\border\char'324}{\border\char'322}
 {\border\char'310} {\border\char'323}
 {\border\char'174}{\border\char'325}{\border\char'175}
 {\parindent=0pt
   \begin{tcolorbox}[width=\textwidth-3.28em-4\fboxsep,left=2mm,right=2mm,enhanced,
     frame empty,nobeforeafter,
     interior code={\path[draw=white,fill=white,box pattern opacity=0.3, box as pattern={}{hua}]
     (interior.south west) rectangle (interior.north east);},
  ]
    \parindent=2\ccwd
    \zhlipsum[1]
  \end{tcolorbox}}}

\end{document}你的这种写法确实会带来一点性能提升。这是由于 TeX 进行了更少的展开和内部操作。哪怕是在 \else、\expandafter 前增加一个 \relax 都会增加编译时间。
\documentclass{article}
\begin{document}

\long\def\loop#1\repeat{\def\iterate{#1\relax\expandafter\iterate\fi}\iterate \let\iterate\relax}
\long\def\xunhuan#1\repeat{\def\iterate{#1\else\let\iterate\relax \fi\iterate}\iterate}
%\long\def\xunhuan#1\repeat{\def\iterate{#1\relax\else\let\iterate\relax \fi\iterate}\iterate \let\iterate\relax}

\count5656=0
\count5657=300000000

%\xunhuan \advance\count5656by1 \ifnum \count5656<\count5657  \relax \repeat
%\the\count5656

\count5656=0
\loop \advance\count5656by1 \ifnum \count5656<\count5657 \relax \repeat
\the\count5656

\end{document}
(谨慎运行!)
这种最简单的循环,在我的电脑上,使用 \loop 大概 61.7s,使用 \xunhuan 大概 57.4s,\loop 大致慢了 6%-8% 左右,但是当需要大量的计算时,用在 \loop 中的时间几乎可以忽略不计,实际区别很小。
但是你的代码与原来的 loop 并不是完全等价的,这里暂时先不说。
只要循环中不保存内容(不修改内部的 hash 表)、不留下 typeset material、不输出信息(log 等),仅包含(有效的)单纯的计算(比如 \advance),(可能所列并不完整,)TeX 不会在循环中消耗一丁点内存,因此理论上这样的“循环”的循环次数是无限的。这与其它编程语言是不同的。
诸如 C 之类的语言,在函数执行时会为其开辟新的内存空间,因此如果在循环时内存不回收,则可能会溢出,
然而在递归时,想要回收这些内存是很难的。
但是 TeX 不一样,TeX 在执行时,只是展开这些宏,
\loop \advance\count5656by1 \ifnum \count5656<\count5657 \repeat展开,变成了
\def\iterate{\advance\count5656by1 \ifnum \count5656<\count5657
  \relax\expandafter\iterate\fi}\iterate
\let \iterate \relax
定义 \iterate,再展开 \iterate,此时 \let\iterate\relax 还未执行:
\advance\count5656by1 \ifnum \count5656<\count5657 \relax\expandafter\iterate\fi
\let\iterate\relax
count 寄存器 5656 加 1,即使是 \ifnum 也是执行展开,假设判断为真,则要么向后找到一个 \else(并不必须是 \else,任何一个被 \let 为 primitive \else 的都可以,要么向后找到一个 \fi(同样不必是 \fi),这一点必须要注意,与 \def 中的参数定界符不同。
这里没有发现 \else,TeX 先展开 \fi,然后将 \iterate 放在即将执行的输出流中。继续递归。
如果判断为假,TeX 不展开 \relax\expandafter\iterate\fi,而是直接找 \else 或 \fi(不必是 \else、\fi)。而此时 \relax\expandafter\iterate\fi 四者完全可能是 \else、\fi 二者之一。如果 \relax\expandafter\iterate 均不是 \else\fi 二者之一,且 \fi 是 primitive \fi,那么 TeX 正确的结束此次循环,并
\let\iterate\relax否则,在预想情况下,应该出错(报错)。因为重定义 \iterate 是不被允许的。
可以看到,在此循环中并不涉及内存分配,因此并不会出现爆栈或 overflow。
而若包含 typeset material 等内容,当一个段落的内容过多,或待输出的 typeset material 过多,或在循环过程中在 hash 表中增加了巨量的内容,则会出现内存用光的情况。这是这两种循环都会出现的。
考虑如下代码:
\documentclass{article}
\begin{document}
\long\def\xunhuan#1\repeat{\def\iterate{#1\else\let\iterate\relax \fi\iterate}\iterate}

\count5656=0
\count5657=3 %00000000

\loop \advance\count5656by1 \let\iterate\fi \ifnum \count5656>\count5657 \repeat

\end{document}
编译报错了,原因正是如上所说的 TeX 并不需要 \fi 是 \fi,任何被 \let 为 primitive \fi 的都可以。但是换成你的 \xunhuan 则不会报错。
至于哪个更好,可能因人而异。
xpinyin 宏包手册中的拼音使用 TeX Gyre Adventor(texgyreadventor-regular.otf)字体。
\newfontfamily\PinYinFont{TeX Gyre Adventor}
\xpinyinsetup{font=\PinYinFont}patterns 无法做到这一点。可以使用 /tikz/path picture。这样可以使用任意内容填充,包括 tikz 绘图命令。
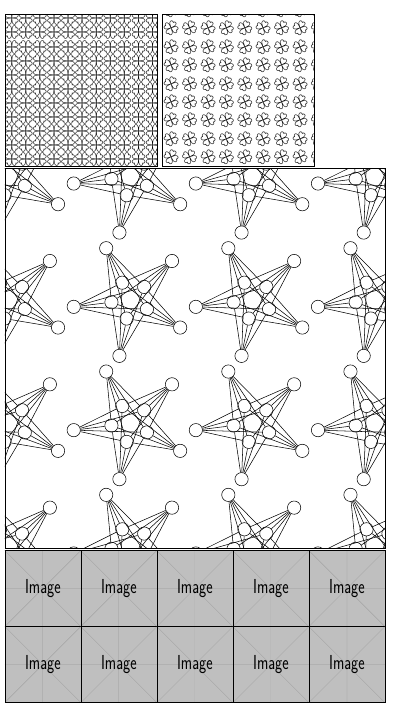
\documentclass{ctexart}
\usepackage{tikz}
\usepackage{bbding}

\makeatletter
\newlength\this@pgf@bop@width
\newlength\this@pgf@bop@height

\def\setboxaspattern#1#2{\expandafter\newbox\csname this@pgf@box@pattern#1\endcsname
  \expandafter\setbox\csname this@pgf@box@pattern#1\endcsname\hbox{#2}%
  \expandafter\edef\csname this@pgf@bop@#1@width\endcsname{\the\wd\csname this@pgf@box@pattern#1\endcsname}%
  \expandafter\edef\csname this@pgf@bop@#1@height\endcsname{\the\ht\csname this@pgf@box@pattern#1\endcsname}%
}
\tikzset{
  box as pattern/.code 2 args={%
    \expandafter\this@pgf@bop@width\csname this@pgf@bop@#2@width\endcsname
    \expandafter\this@pgf@bop@height\csname this@pgf@bop@#2@height\endcsname
    \pgfkeysalso{/tikz/path picture={%
      \pgf@process{\pgfpointanchor{path picture bounding box}{north east}}%
      \pgf@xa\pgf@x \pgf@ya\pgf@y
      \pgf@process{\pgfpointanchor{path picture bounding box}{south west}}%
      \pgf@xb\pgf@x \pgf@yb\pgf@y \pgf@yc\pgf@yb
      \pgfutil@loop
        {%
        \pgfutil@loop
          \expandafter\pgftext\expandafter[#1,at=\pgfqpoint{\pgf@xb}{\pgf@yb}]{\copy\csname this@pgf@box@pattern#2\endcsname}%
          \ifdim\pgf@yb<\pgf@ya
          \advance\pgf@yb\this@pgf@bop@height
        \pgfutil@repeat
        }%
        \ifdim\pgf@xb<\pgf@xa
        \advance\pgf@xb\this@pgf@bop@width
        \pgf@yb\pgf@yc
      \pgfutil@repeat
    }}%
  }
}
\makeatother

\setboxaspattern{hua}{\FourClowerOpen}
\setboxaspattern{huarotate}{\rotatebox{22.5}{\FourClowerOpen}}
\setboxaspattern{image}{\includegraphics[width=2cm,height=2cm]{example-image}}
\usetikzlibrary{graphs,graphs.standard}
\setboxaspattern{tikzfancy}{\tikz
  \graph [nodes={draw, circle, rotate=25}, clockwise, radius=.5cm,
    empty nodes, n=5] {
      subgraph I_n [name=inner] --[complete bipartite]
      subgraph I_n [name=outer]
    };}

\begin{document}

\begin{tikzpicture}
 \draw[box as pattern={left,base}{hua}](0,0)rectangle(4,4);
\end{tikzpicture}
\tikz\draw[box as pattern={left,top}{huarotate}](0,0)rectangle(4,4);

\tikz\draw[box as pattern={}{tikzfancy}](0,0)rectangle(10,10);

\tikz\draw[box as pattern={left,bottom}{image}](0,0)rectangle(10,4);
\end{document}
\setboxaspattern 第一个参数是 box pattern 名,第二个参数是内容。box as pattern 的第一个参数是 \pgftext 可用的选项,第二个参数为预先定义的 box pattern 名。
可以做成在使用时声明,但为了一致性(pattern 均是先声明再使用),仍然做成声明和使用分离的。
参考:https://tex.stackexchange.com/questions/103980
实际上,这样使用会重复使用这些盒子,造成一定的浪费。理想情况下,对于这种重复的内容,应该仅存储一个,之后的内容引用这一个即可。但目前只有 pdftex(和 luatex 的 pdf 模式)能做到这一点,xetex 无法做到。
而 xetex 要支持这一点,则要等到 LaTeX 2022-06-01 这一版(也就是目前的 LaTeX-dev)或者使用 pdfmanagement-testphase。
有两个问题,
\ref 不能被完全展开,因此不能用于 f、x、e 等展开类型中,否则会出错,必须使用底层的宏来得到 ref;\printman{ test01 },时,一般两侧的空格是不需要的,使用 \NewDocumentCommand { >{\TrimSpaces} m } 在传参时将其去除。改动的地方只有两个:
\makeatletter
% 棋谱输出用户接口
% #1 棋谱label
\NewDocumentCommand{\printman}{ >{\TrimSpaces} m } % 去掉两侧空格
  {
    \__cchess_setman_print:n { #1 }
  }
\cs_set:Npn \use_i:nnnnn #1#2#3#4#5 {#1} % LaTeX3 并未定义 \use_i:nnnnn
% 棋谱输出
\cs_new:Npn \__cchess_setman_print:n #1
  {
    \cs_if_exist:cTF { r@#1 }
      {
        % 这一步是得到 ref,它保存在 \r@#1 中。\r@#1 有两项,当使用 hyperref 时,
        % \r@#1 有 5 项,这里使用 \empty 统一解决
        \tl_set:Nx \l_tmpa_tl
          { #1 \exp_args:NNc \exp_after:wN \use_i:nnnnn { r@ #1 } \c_empty_tl \c_empty_tl \c_empty_tl .man }
        \ior_open:NnTF \g_tmpb_ior { \l_tmpa_tl }
          {
            \ior_str_map_inline:Nn
            % \ior_map_inline:Nn
              \g_tmpb_ior
                { ##1\par }
          }
          { \msg_error:nnx { csv } { file-not-found } { \l_tmpa_tl } }

        \iow_close:N \g_tmpa_ior
      }
    { \G@refundefinedtrue }% 引用未定义
  }
完整代码:
\documentclass{ctexart}

\usepackage{xparse}
%\usepackage{hyperref}
%\usepackage{nameref,cleveref}

\makeatletter
\ExplSyntaxOn

% \label命令变体
\cs_new_protected_nopar:Npn \__cchess_setman_label:n { \label }
\cs_generate_variant:Nn \__cchess_setman_label:n { x }
\cs_set:Npn \use_i:nnnnn #1#2#3#4#5 {#1}

% 是否输出棋谱
\bool_new:N   \l__cchess_with_setman_bool
% 棋谱文字说明列表(如车一进二等)
\clist_new:N \l__cchess_manual_clist

% 打谱环境棋谱标签
\tl_new:N    \l__cchess_setman_label_tl
\tl_new:N    \l__cchess_setman_label_num_tl

% 打谱环境用计数器
\newcounter{setman}

\coffin_new:N \l__cchess_manual_coffin

% key_value选项设计
\keys_define:nn { cchess }
  {
    % 棋盘背景图片
    label .tl_gset:N  = \l__cchess_setman_label_tl ,
    label .initial:n = {} ,
  }

% 打谱排版环境用户接口
\NewDocumentEnvironment{ setcchessman* }{  O{} +b }
  {
    \group_begin:
      \bool_set_true:N  \l__cchess_with_setman_bool
      \keys_set:nn { cchess } { #1 }
      \__cchess_setcchessman_pre_setup:n { #2 }
  }{
      \__cchess_setcchessman_post_setup:
    \group_end:
  }

% 棋谱输出用户接口
% #1 棋谱label
\NewDocumentCommand{\printman}{ >{\TrimSpaces} m }
  {
    \__cchess_setman_print:n { #1 }
  }

% 打谱环境前处理函数
% #1 打谱命令
\cs_new:Npn \__cchess_setcchessman_pre_setup:n #1
  {
    \hcoffin_set:Nn \l__cchess_manual_coffin
      { 这是一个棋盘 }
    \clist_put_right:Nn \l__cchess_manual_clist { 车九进一 }
    \clist_put_right:Nn \l__cchess_manual_clist { 马3退2   }
  }

% 打谱环境后处理函数
\cs_new:Nn \__cchess_setcchessman_post_setup:
  {

    % 输出结果盒子容器
    \coffin_typeset:Nnnnn \l__cchess_manual_coffin
      { l }{ b } { 0pt } { 0pt }

    % 星号环境需要输出打谱记录
    \bool_if:NT \l__cchess_with_setman_bool
      {
        % 递增计数器
        \refstepcounter{setman}
        % 设置label标签
        \__cchess_setman_label:x { \l__cchess_setman_label_tl }

        % 构造文件名
        \iow_open:Nn \g_tmpa_iow { \l__cchess_setman_label_tl\thesetman .man }

        % 遍历打谱记录列表,输出打谱记录
        \bool_until_do:nn { \clist_if_empty_p:N \l__cchess_manual_clist }
          {
            \clist_pop:NN \l__cchess_manual_clist \l_tmpa_tl
            \iow_now:Nx \g_tmpa_iow { \l_tmpa_tl }
          }

        \iow_close:N \g_tmpa_iow
      }
  }

% 棋谱输出
\cs_new:Npn \__cchess_setman_print:n #1
  {
    % 根据棋谱label构建文件名
    % 此处无法构建文件名
    \cs_if_exist:cTF { r@#1 }
      {
        \tl_set:Nx \l_tmpa_tl
          { #1 \exp_args:NNc \exp_after:wN \use_i:nnnnn { r@ #1 } \c_empty_tl \c_empty_tl \c_empty_tl .man }
        \ior_open:NnTF \g_tmpb_ior { \l_tmpa_tl }
          {
            \ior_str_map_inline:Nn
            % \ior_map_inline:Nn
              \g_tmpb_ior
                { ##1\par }
          }
          { \msg_error:nnx { csv } { file-not-found } { \l_tmpa_tl } }

        \iow_close:N \g_tmpa_ior
      }
    { \G@refundefinedtrue }% 引用未定义
  }

% 文件不存在错误提示
\msg_new:nnn { cchess } { file-not-found } { File~`#1'~not~found. }
\ExplSyntaxOff

\begin{document}

天圆地方大战的棋谱如棋谱 \ref{test01} 所示。

\begin{setcchessman*}[label=test01]
  % 打谱命令
\end{setcchessman*}

\bigskip

这是一个棋谱

\printman{ test01 }

\bigskip

\bigskip

昏天黑地大战的棋谱如棋谱 \ref{test02} 所示。

\begin{setcchessman*}[label=test02]
  % 打谱命令
\end{setcchessman*}

\end{document}
写入临时文件时,可以在文件名前加上 \jobname(\c_sys_jobname_str)与其它主文件的辅助文件区分开来。
使用 ctex 宏包或其文档类以后,不要再使用 titlesec 宏包,直接使用 heading 选项或者 ctexheading 宏包。ctexheading 宏包基本有与 titlesec 宏包等价的设置方式,并且接口更加友好。
\addcontentsline 前需使用 \phantomsection 以正确设置超链接位置。heading 选项后,可以直接设置 \ctex{.../numbering=false} 不对标题编号,但仍输出至目录,并正确设置超链接和书签。\documentclass[12pt,a4paper]{article}
\usepackage[UTF8,heading]{ctex}
\usepackage{geometry}
\geometry{a4paper,left=3.18cm,right=3.18cm,top=2.54cm,bottom=2.54cm}
\usepackage{amsmath}
\usepackage{amsthm}
\usepackage[numbers,sort&compress]{natbib}
\usepackage{tabularx}
\usepackage{hyperref}
\usepackage{booktabs}
\usepackage{graphicx}
\usepackage{setspace}
\ctexset{section/format=\centering\fontsize{16pt}{19.2pt}\bfseries,section/aftername=\quad}
%\usepackage{titlesec}
%\titleformat{\section}{\centering\fontsize{16pt}{19.2pt} \bfseries}{\thesection}{1em}{}
\numberwithin{equation}{section}
\linespread{1.5}
\begin{document}
\newpage
\tableofcontents
\newpage
\section{背景介绍与研究现状}
\newpage
\section{平衡点的线性稳定性}
\newpage
\section{数值模拟}\label{sec6}
\newpage
\section{总结与讨论}\label{sec7}
\newpage
\phantomsection
\addcontentsline{toc}{section}{参考文献}
\begin{thebibliography}{99}
\end{thebibliography}
\clearpage
%\setcounter{secnumdepth}{0}
\ctexset{section/numbering=false}
\section{致谢}
%\addcontentsline{toc}{section}{致谢}
谢谢谢谢谢
\end{document}这可能是 XeLaTeX 下特有的 bug。
使用其它引擎编译即可,需修改代码。这里提供 LuaLaTeX 和 upLaTeX 的方法。另外在 upLaTeX 下需自行修改 jfm,否则标点符号仍然使用全宽标点。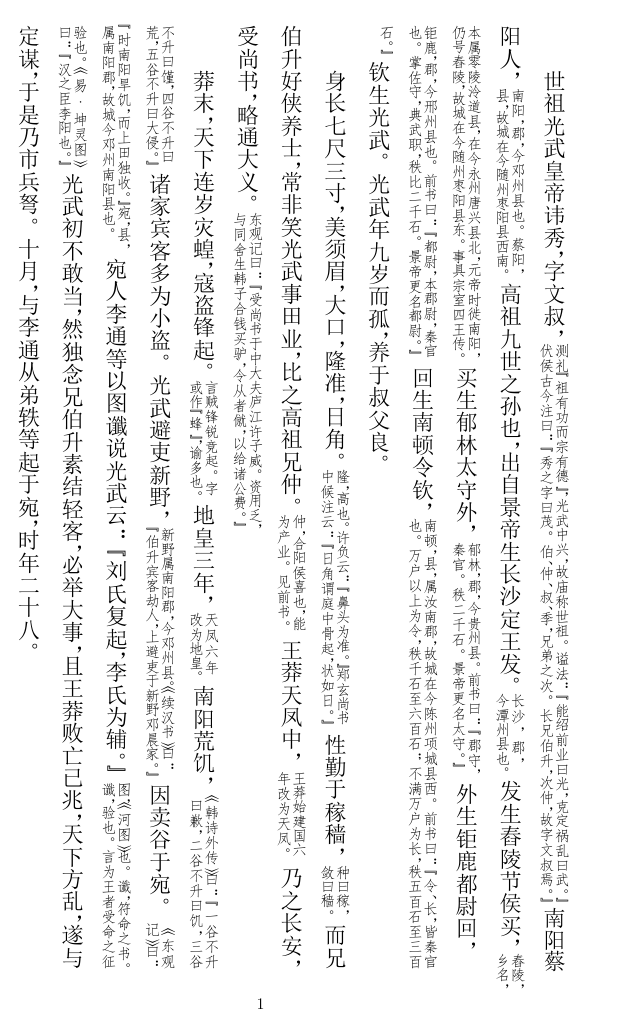
%%--- LuaLaTeX
%%--- lualatex main.tex
\documentclass[12pt,tate]{ltjarticle}
\usepackage{luatexja-fontspec}
\setmainjfont[TateFeatures = {JFM={zh_CN/{kaiming,vert}}}]{SimSun}
\newjfontface\fangsong[TateFeatures = {JFM={zh_CN/{kaiming,vert}}}]{SimFang}
\linespread{1.3}\selectfont % 适配 ctex 的行间距
\Large\parindent=2\zw % 缩进
%%---

%%--- upLaTeX
%%--- ptex2pdf -u -l main.tex
%\documentclass[12pt]{utarticle}
%\usepackage{ctex}
%%---

\usepackage{lltjp-geometry} % 在 LuaLaTeX 和 upLaTeX 下,直排需使用这个宏包以适配 geometry
\usepackage[a4paper,margin=1in]{geometry}
\usepackage{jiazhu}
\jiazhuset{
format =\fangsong,
beforeskip =0.5em plus 0.2em minus 0.2em,
afterskip =0.5em plus 0.2em minus 0.2em}

\begin{document}
\Large

世祖光武皇帝讳秀,字文叔,\jiazhu{测礼“祖有功而宗有德”,光武中兴,故庙称世祖。谥法:“能绍前业曰光,克定祸乱曰武。”伏侯古今注曰:“秀之字曰茂。伯、仲、叔、季,兄弟之次。长兄伯升,次仲,故字文叔焉。”}南阳蔡阳人,\jiazhu{南阳,郡,今邓州县也。蔡阳,县,故城在今随州枣阳县西南。}高祖九世之孙也,出自景帝生长沙定王发。\jiazhu{长沙,郡,今潭州县也。}发生舂陵节侯买,\jiazhu{舂陵,乡名,本属零陵泠道县,在今永州唐兴县北,元帝时徙南阳,仍号舂陵,故城在今随州枣阳县东。事具宗室四王传。}买生郁林太守外,\jiazhu{郁林,郡,今贵州县。前书曰:“郡守,秦官。秩二千石。景帝更名太守。”}外生钜鹿都尉回,\jiazhu{钜鹿,郡,今邢州县也。前书曰:“都尉,本{郡尉},秦官也。掌佐守,典武职,秩比二千石。景帝更名都尉。”}回生南顿令钦,\jiazhu{南顿,县,属汝南郡,故城在今陈州项城县西。前书曰:“令、长,皆秦官也。万户以上为令,秩千石至六百石;不满万户为长,秩五百石至三百石。”}钦生光武。光武年九岁而孤,养于叔父良。

身长七尺三寸,美须眉,大口,隆准,日角。\jiazhu{隆,高也。许负云:“鼻头为准。”郑玄尚书中候注云:“日角谓庭中骨起,状如日。”}性勤于稼穑,\jiazhu{种曰稼,敛曰穑。}而兄伯升好侠养士,常非笑光武事田业,比之高祖兄仲。\jiazhu{仲,合阳侯喜也,能为产业。见前书。}王莽天凤中,\jiazhu{王莽始建国六年改为天凤。}乃之长安,受尚书,略通大义。\jiazhu{东观记曰:“受尚书于中大夫庐江许子威。资用乏,与同舍生韩子合钱买驴,令从者僦,以给诸公费。”}

莽末,天下连岁灾蝗,寇盗锋起。\jiazhu{言贼锋锐竞起。字或作“蜂”,谕多也。}地皇三年,\jiazhu{天凤六年改为地皇。}南阳荒饥,\jiazhu{《韩诗外传》曰:“一谷不升曰歉,二谷不升曰饥,三谷不升曰馑,四谷不升曰荒,五谷不升曰大侵。”}诸家宾客多为小盗。光武避吏新野,\jiazhu{新野属南阳郡,今邓州县。《续汉书》曰:“伯升宾客劫人,上避吏于新野邓晨家。”}因卖谷于宛。\jiazhu{《东观记》曰:“时南阳旱饥,而上田独收。”宛,县,属南阳郡,故城今邓州南阳县也。}宛人李通等以图谶说光武云:“刘氏复起,李氏为辅。”\jiazhu{图,《河图》也。谶,符命之书。谶,验也。言为王者受命之征验也。《易·坤灵图》曰:“汉之臣李阳也。”}光武初不敢当,然独念兄伯升素结轻客,必举大事,且王莽败亡已兆,天下方乱,遂与定谋,于是乃市兵弩。十月,与李通从弟轶等起于宛,时年二十八。
\end{document}jiazhu 宏包版本太旧。
使用这一个版本:jiazhu.sty
使用 upLaTeX 或 pLaTeX-ng 编译,不能使用其它引擎: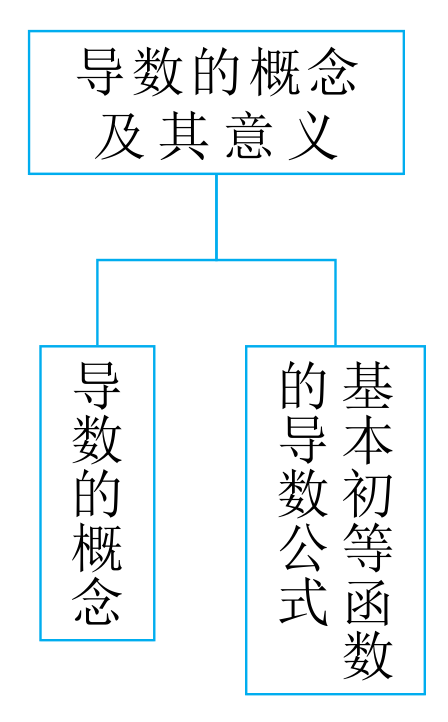
\documentclass[tikz,border=5pt,dvipdfmx]{standalone}
\usepackage{ctex}
\newcommand\nodebox[2][5\ccwd]{\hbox{\vbox{\parindent=0pt \linespread{1}\selectfont
  \setlength\hsize{#1}\tate #2}}}
\usetikzlibrary{arrows.meta,calc,positioning}
\tikzstyle{every node}=[font=\small]
\tikzset{>={Stealth[scale=1.1]}}
\tikzset{NR/.style={rectangle,draw,minimum height=0.5cm,inner ysep
=2pt,inner xsep=5pt,text=black,align=center,font=\linespread{1}\small}}
\begin{document}
\begin{tikzpicture}[node distance=1cm,cyan]
\node[NR,text width=5em](a){导数的概念及其意义};
\node[NR,below=of a,xshift=-0.7cm,align=left](a1){\tate 导数的概念};
\node[NR,below=of a,xshift=0.7cm,align=left](a2){\nodebox[6\ccwd]{基本初等函数的导数公式}};
\path(a.south)--++(0,-0.5cm)coordinate(x);
\draw(a.south)--(x)-|(a1.north);
\draw(a.south)--(x)-|(a2.north);
\end{tikzpicture}

\end{document}
upLaTeX 编译:
uplatex main.tex % 生成 dvi(main.dvi)
dvipdfmx main.dvi % 生成 pdf(main.pdf)
pLaTeX-ng 编译:
platex-ng main.tex % 生成 dvi(main.dvi)
dvipdfmx main.dvi % 生成 pdf(main.pdf),这一步必须使用 dvipdfmx,默认生成的 pdf 仍保留空白边距(1)插入垂直间距 -1em。(2)这是使用垂直字体导致的,不能正确计算盒子的宽度,根本原因是目前 xetex 没有垂直排版的能力,只能靠旋转来实现。要使用垂直排版,最好使用 upLaTeX、pLaTeX-ng,或 ConTeXt MKXL(LuaMetaTeX)。(3)修改 \lineskiplimit,\lineskip。
\documentclass{ctexart}
\usepackage{graphicx}
\setCJKmainfont{SimSun}
\setCJKfamilyfont{songvert}[RawFeature={vertical:+vert}]{SimSun}
\newcommand*\CJKmovesymbol[1]{\raise.7em\hbox{#1}}
\newcommand*\CJKmove{
\let\CJKsymbol\CJKmovesymbol
\let\CJKpunctsymbol\CJKsymbol}
\usepackage{varwidth}
\newcommand{\shupai}[1]{\rotatebox{-90}{%
\begin{varwidth}{\textwidth}
\CJKfamily{songvert}
\lineskip=-3pt
\lineskiplimit=1pt
\CJKmove
#1\end{varwidth}}}
\newcommand{\SHUPAI}[1]{\rotatebox{-90}{%
\CJKfamily{songvert}%
\CJKmove
#1}}

\begin{document}
上文上文上文上文上文上文上文上文上文上文

\vspace*{-1em}\fbox{\shupai{文本框框\\测试}}

下文下文下文下文下文下文下文下文

\vspace*{-1em}\fbox{\SHUPAI{文本框框}}

测试测试测试测试测试测试测试测试测试测试测试测试
\end{document}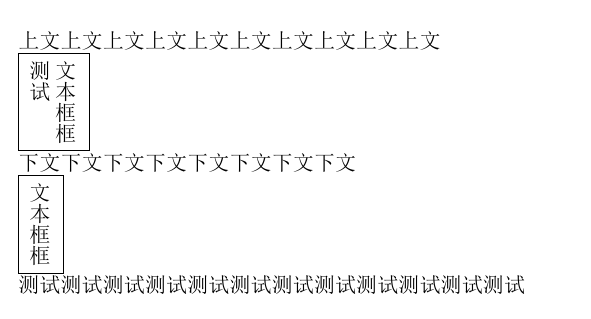
你可以定义一个近似 dash 命令,
\ExplSyntaxOn
\NewDocumentCommand \approxhdashrule { O{0pt} m m m }
  {
    \hbox_to_wd:nn {#2}
      {
        \int_set:Nn \l_tmpa_int
          {
            2 * \int_div_round:nn { \int_value:w \tex_dimexpr:D #2 }
                                  { 2 * \int_value:w \tex_dimexpr:D #4 } + 1
          }
        \dim_set:Nn \l_tmpa_dim { \dim_eval:n {#2} / \l_tmpa_int }
        \hdashrule [#1] {#2} {#3} { \l_tmpa_dim }
        \hbox_overlap_left:n { \rule [#1] { \l_tmpa_dim } {#3} }
      }
  }
\ExplSyntaxOff
在尾部附加了一个 \rule。不过只能使用单个长度,不能使用不等长的(比如 1mm 2mm 1mm)。
由于在盒子中,自带了一个组,所以无需显式使用 \begingroup ... \endgroup。
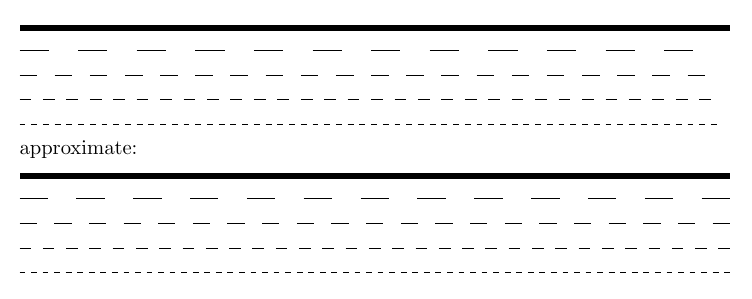
\documentclass{article}
\usepackage{dashrule}
\setlength{\parindent}{0mm}
\begin{document}
\rule[0mm]{\linewidth}{1mm}
\hdashrule[0.5ex]{\linewidth}{0.5pt}{5mm}%

\hdashrule[0.5ex]{\linewidth}{0.5pt}{3mm}%

\hdashrule[0.5ex]{\linewidth}{0.5pt}{2mm}%

\hdashrule[0.5ex]{\linewidth}{0.5pt}{1mm}%

approximate:

\ExplSyntaxOn
\NewDocumentCommand \approxhdashrule { O{0pt} m m m }
  {
    \hbox_to_wd:nn {#2}
      {
        \int_set:Nn \l_tmpa_int
          {
            2 * \int_div_round:nn { \int_value:w \tex_dimexpr:D #2 }
                                  { 2 * \int_value:w \tex_dimexpr:D #4 } + 1
          }
        \dim_set:Nn \l_tmpa_dim { \dim_eval:n {#2} / \l_tmpa_int }
        \hdashrule [#1] {#2} {#3} { \l_tmpa_dim }
        \hbox_overlap_left:n { \rule [#1] { \l_tmpa_dim } {#3} }
      }
  }
\ExplSyntaxOff

\rule[0mm]{\linewidth}{1mm}

\approxhdashrule[0.5ex]{\linewidth}{0.5pt}{5mm}%

\approxhdashrule[0.5ex]{\linewidth}{0.5pt}{3mm}%

\approxhdashrule[0.5ex]{\linewidth}{0.5pt}{2mm}%

\approxhdashrule[0.5ex]{\linewidth}{0.5pt}{1mm}%

\end{document}你引入了 paralist 宏包,它不能和 enumitem 同时使用。你把 paralist 那段代码全删掉。enumitem 的 nosep 选项可以清除前后空白。
然后,用 \setlist[enumerate,2]{label=(\arabic*)} 统一设置二级列表的 label,或者写 \begin{enumerate}[label=(\arabic*)]。
\documentclass[11pt,a4paper]{article}
\pagestyle{plain}

\usepackage{ctex}            % 显示中文宏包
%\usepackage{snotez}            % 侧边标注宏包

\usepackage{marginnote}        % 侧边标注宏包
\usepackage{ragged2e}
\renewcommand{\marginfont}{\small\kaishu}
\renewcommand*{\raggedrightmarginnote}{}
\renewcommand*{\raggedleftmarginnote}{}


\usepackage{geometry}
%\geometry{left=2.8cm,right=1.8cm,top=2.8cm,bottom=2.8cm}
\geometry{inner=2cm,outer=2cm,bottom=1.5cm,top=2cm,marginparwidth=4.5cm,marginparsep=0.5cm,includemp}

\usepackage[dvipsnames]{xcolor}

\usepackage{fontspec}
\setmainfont{Times New Roman}

% \linespread{1.25}                % 设置整体行距
\usepackage{setspace}            % 行距设置宏包

\usepackage{tocloft}            % 目录格式宏包
\renewcommand\cfttoctitlefont{\hfill\Large\sffamily\bfseries\color{BrickRed}\centering}
\renewcommand\cftaftertoctitle{\hfill}
\setlength\cftbeforetoctitleskip{2ex}
\setlength\cftaftertoctitleskip{2ex}

%\setcounter{tocdepth}{1}

\usepackage{titlesec}            % 目录宏包
\usepackage{titletoc}            % 目录宏包
%\usepackage[toc]{multitoc}        % 多级目录

\usepackage{enumerate}
\usepackage{enumitem}
%\renewcommand{\labelenumii}{(\ensuremath{\arabic{enumii}})}
\setlist[enumerate,2]{label=(\arabic*)}%%% 正确的做法
%\renewcommand{\labelenumi}{(\ensuremath{\theenumi})}
\setlist[enumerate,1]{label=\arabic*.}%%% 正确的做法
%\setlist[enumerate]{listparindent=\parindent}
\usepackage{booktabs}
\usepackage{array}
\usepackage{tabularx}
\usepackage{tabu}
\usepackage{makecell}
\usepackage{longtable,booktabs}
\usepackage{ltxtable}

%%%% 解决Itemize和Enumerate的item之间行距过大的问题
\setlist{nosep}%%% 正确的做法
%\usepackage{paralist}
%\let\itemize\compactitem
%\let\enditemize\endcompactitem
%\let\enumerate\compactenum
%\let\endenumerate\endcompactenum
%\let\description\compactdesc
%\let\enddescription\endcompactdesc
%%%% ---------

\usepackage{fancyhdr}

\setlength{\parindent}{0pt} % 放在段首,之后的所有段落都将取消首行缩进
\setlength{\parskip}{0.6\baselineskip} %设置段落间距


%\author{My Name}
\date{April, 2022}
\title{一级建造师执业资格考试市政务实 \\
~      \\  % 插入空行
~      \\
历年真题笔记}

\begin{document}

    \maketitle            % 生成标题

    \thispagestyle{empty}    % 当前页无页眉页脚

    \newpage

    \tableofcontents

%    \titlecontents{section}
%                  [3cm]
%                  {\bf \large}%
%                  {\contentslabel{2.5em}}%
%                  {}%
%                  {\titlerule*[0.5pc]{$\cdot$}\contentspage\hspace*{3cm}}

    \titlecontents{section}
                  [3em]
                  {\vspace{3mm}\bf \large}
                  {\contentslabel{2em}}
                  {}
                  {\titlerule*[0.5pc]{$\cdot$}\contentspage\hspace*{0em}}

    \titlecontents{subsection}
                  [5em]
                  {\vspace{3mm}}
                  {\contentslabel{2em}}
                  {}
                  {\titlerule*[0.5pc]{$\cdot$}\contentspage\hspace*{0em}}

    \titlecontents{subsubsection}
                  [8em]
                  {\vspace{2.5mm}}
                  {\contentslabel{3em}}
                    {}
                  {\titlerule*[0.5pc]{$\cdot$}\contentspage\hspace*{0em}}

    \thispagestyle{empty}

    \newpage    %第一节

    \section{20220330真题解析桥梁}

%    \setlength{\parskip}{0.6\baselineskip} %设置段落间距

    \setcounter{page}{1}

%    \begin{spacing}{1.25}

    某桥梁工程项目的下部结构已全部完成,受政府指令工期的影响,业主将尚未施工的上部结构分成A、B二个标段,将B段重新招标。桥面宽度17.5m,桥下净空6m,上部结构设计为钢筋混凝土预应力现浇箱梁(三跨一联),共40联。

    原施工单位甲公司承担A标段,该标段施工现场系既有废弃公路无需处理,满足支架法施工条件,甲公司按业主要求对原施工组织设计进行了重大变更调整;新中标的乙公司承担B标段,因B标施工现场地处闲置弃土场,地域宽广平坦,满足支架法施工部分条件,其中纵坡变化较大部分为跨越既有正在通行的高架桥段,新建桥下净空高度达13.3m(如图所示)。

    甲、乙两公司接受任务后立即组织力量展开了施工竞赛。甲公同利用既有公路作为支架基础,地基承载力符合要求。乙公司为赶工期,将原地面稍作整平后即展开支架搭设工作,很快进度超过甲公司。支架全部完成后,项目部组织了支架质量检查,并批准模板安装。模板安装完成后开始绑扎钢筋。指挥部检查中发现乙公司施工管理存在问题,下发了停工整改通知单。

%    \end{spacing}

    问题

\begin{enumerate} % 阿拉伯数字编号

\item 原施工组织设计中主要施工资源配置有重大变更调整,项目部应如何处理?重新开工之前技术负责人和安全负责人应完成什么工作?
\item 满足支架法施工的部分条件指的是什么?
\item B标支架搭设场地是否满足支架的地基承载力?应如何处置?
\item 支架搭设前技术负责人应做好哪些工作?桥下净高13.3m部分如何办理手续?
\item 支架搭设完成和模板安装后用什么方法解决变形问题?支架拼装间隙和地基沉降在桥梁建设中属哪一类变形?
\item 跨越既有高架部分的桥梁施工需到什么部门补充办理手续?

\end{enumerate}

\newpage

    回答\marginnote{基础知识 + 解题思路 }

\begin{enumerate}

\item 原施工组织设计中主要施工资源配置有重大变更调整,\marginnote{施工组织设计(变更)审批流程 \\
\\
技术负责人 / 安全技术交底、参与施工组织设计编制、校核 \\
\\
安全负责人 / 参与施工组织设计编制、校核 \\
\\
培训教育施工作业人员}
项目部应如何处理?重新开工之前技术负责人和安全负责人应完成什么工作?

\begin{enumerate}

\item 主要资源配置发生重大变更调整后,项名部应执行施工组织设计变更审批流程。\\
项目经理重新组织编制施工组织设计,提交施工单位技术负责人审核签字加盖公章,经总监理工程师审查签认后交由建设公司审核。
\item 重新开工前,项目技术负责人对全体施工人员做书面安全技术交底,留交底人、被交底人和专职安全员签字归档,过程中监督检查持续更新。
\item 安全负责人参与安全技术交底,对作业人员进行安全教育培训,检查安全保障工具。
技术负责人和安全负责人参与施工组织设计中的安全技术方案编制校核工作。

\end{enumerate}

\vspace{0.6em}

\item 满足支架法施工的部分条件指的是什么?\marginnote{市政工程施工特点,结合案例背景}

\begin{enumerate}
\item 施工现场地处闲置弃土场,干扰少,材料、工器具进出方便。
\item 地域宽广平坦,作业面大,施工操作方便。
\end{enumerate}

\vspace{0.6em}

\item B 标支架搭设场地是否满足支架的地基承载力?应如何处置?\marginnote{地基:平整坚实+排水良好 \\
    \\
    流程:压实平整 → 验算承载力 → 不满足换填加固 → 预压合格留记录归档 → 防排水 → 混凝土地块或钢板}

\begin{enumerate}
\item 不满足
\item 清理表层、平整场地、填充坑穴,分层碾压密实,校验地基承载力。
\item 如地基承载力不满足要求则换填加固,直至承载力合格。
\item 支架搭设前预压地基,验收合格留记录归档。
\item 支架地基设置防排水设施,冬季设置防冻胀措施。
\item 基础上安装钢板或混凝土垫块,增大支架受力面积。
\end{enumerate}

\end{enumerate}


\newpage


\end{document}(1)这可能是一个 bug,见:https://github.com/CTeX-org/ctex-kit/issues/530,目前未解决。
(2)容易解决,但同样无法用于 amsmath 的某些环境,而且颜色的高度固定为普通文字那么高。
\documentclass[fontset=windows]{ctexart}
\usepackage{ulem}
\usepackage{xeCJKfntef}
\usepackage{xcolor}
\makeatletter
\newcommand{\hltext}[1]{\CJKunderanyline*{0.5ex}{\color{yellow}\rule{0.1pt}{2.5ex}}{#1}}
\newcommand\hlmath[1]{\mathpalette{\hlmath@aux}{#1}}
\def\hlmath@aux#1#2{\hbox{\hltext{\m@th$#1#2$}}}
\newcommand*\hl{\ifmmode\expandafter\hlmath\else\expandafter\hltext\fi}
\makeatother
\begin{document}
一般地,设$A$,$B$是两个非空数集,\hl{如果按某种对应关系{ }$f$,对于集合~$A$中的任意一
个数~$x$,在集合~$B$中都有唯一的数~$\displaystyle\int f(x)$和它对应},那么就称$f$为集合$A$到集
合$B$的一个函数,记作
\[ \hl{y=\int f(x),x\in A.}\quad f_{\hl{x}} \]
\end{document}
问 报错信息是:package zhnumber Error: ` section ' is not a LaTeX counter.