
我试了一下,虽然没有任何提示,但是在这个网页 只要耐心等一分钟就可以触发自动下载。
我试了一下,虽然没有任何提示,但是在这个网页 只要耐心等一分钟就可以触发自动下载。
但为何在macOS下,却无法在终端中使用makeglossaries命令编译词汇表,提示找不到命令终端能找到系统程序的必要条件是 makeglossaries.exe 需要在系统的 $PATH 路径下,可以尝试一下环境变量路径下是否真的有 makeglossaries.exe 这个程序。
\documentclass[fontset=fandol]{ctexbeamer}
% Refs: https://tex.stackexchange.com/a/380895
% \usepackage{multicol}
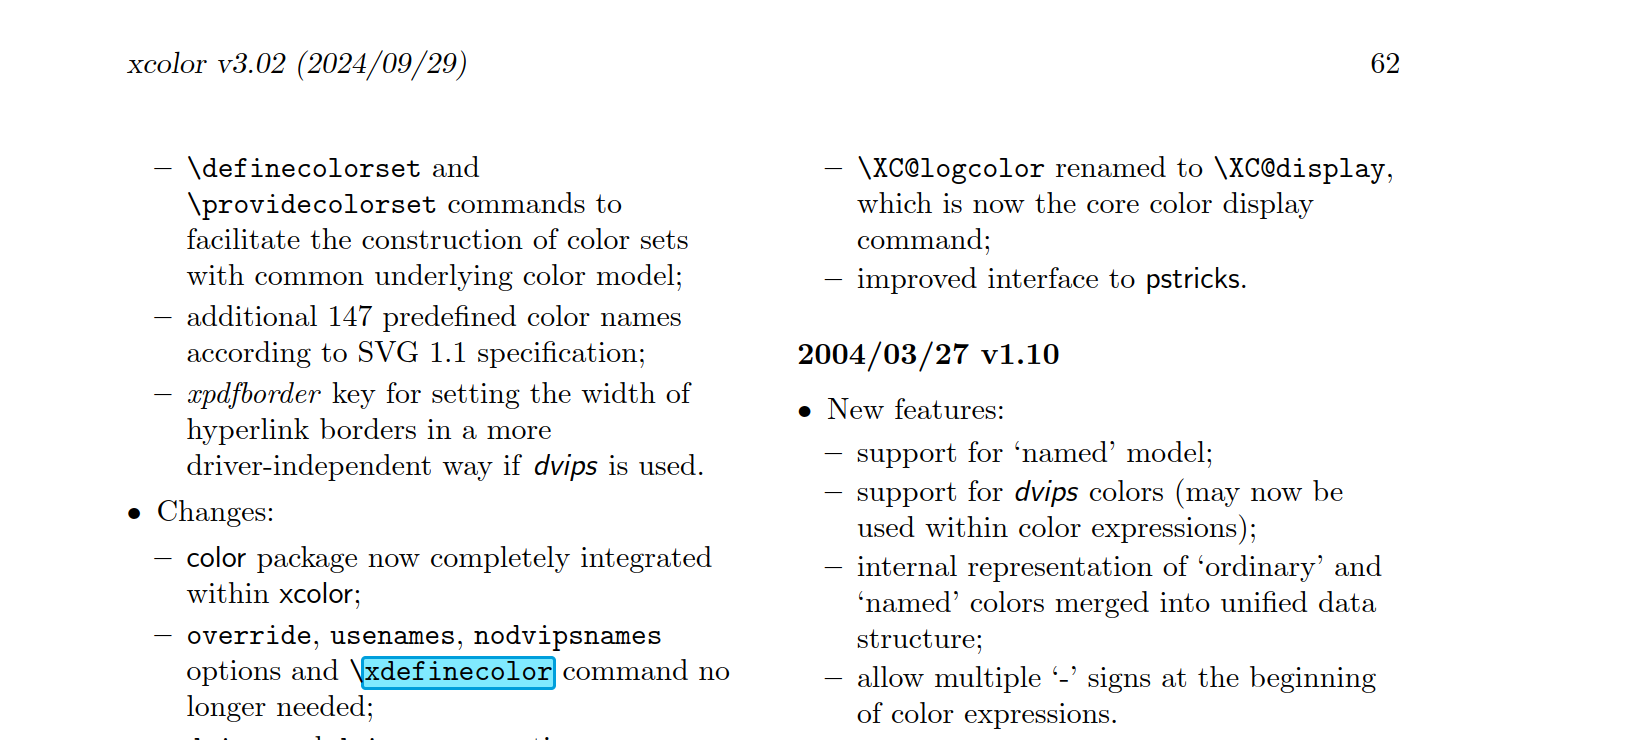
\xdefinecolor{mycolor}{RGB}{0,102,204}
\begin{document}
{%
\setbeamertemplate{headline}{}
\setbeamertemplate{footline}{}
\begin{frame}[plain]%
% \vspace*{\fill}
\centering
{\Huge \bfseries \textcolor{mycolor}{目录}}%
\vspace{1.2em}%
\textcolor{mycolor}{\hrule}
\vspace{1.5em}%
% \begin{minipage}{0.85\textwidth}%
% \begin{multicols}{2}
% \tableofcontents[hideallsubsections]
% \end{multicols}
% \end{minipage}
\begin{columns}
\begin{column}{.3\textwidth}%
\tableofcontents[sections=1-3,hideallsubsections]
\end{column}%
\begin{column}{.3\textwidth}%
\tableofcontents[sections=4-6,hideallsubsections]
\end{column}%
\end{columns}%
\end{frame}%
}
\section{第一章 研究背景}
\section{第二章 研究意义}
\section{第三章 研究内容}
\section{第四章 研究方法}
\section{第五章 技术路线}
\section{第六章 总结展望}
\begin{frame}
正文
\end{frame}
\end{document}
BTW, xdefinecolor好像很少见...
请用「CTeX套装」试试而不是「TeXLive/Miktex」。同时如果还不行,请详细说明你具体是怎么做的,报错信息是什么?
很简单的办法参考自: https://ask.latexstudio.net/ask/question/8198.html
对于这种分段函数,直接使用tikz用直线绘制即可,你甚至可以很方便的控制颜色,线条样式、粗细等特征:
\documentclass[tikz,border=5pt]{standalone}
\usepackage[fontset=fandol]{ctex}
\usepackage[osf]{libertine} % 我喜欢的一款字体
\begin{document}

\begin{tikzpicture}[
    line cap=round,
    every node/.style={black}
    ]
\draw[-latex] (0,0) -- (6,0) node[below]{t(h)};
\draw[-latex] (0,0) -- (0,6) node[right]{s(km)};

\node[below left] {0};

\foreach \i in {1,...,5}{
    \draw(0,\i) node[left] {\inteval{10*\i}} -- ++(.2,0);
    \draw(\i,0) node[below] {\inteval{\i}} -- ++(0,.2);
}

\draw[magenta,thick] (0,0)
    -- (1,3) node[left] {A}
    -- (1.5,3) node[right] {B}
    -- (2,5) node[above left=-1pt] {C}
    -- (2.75,5) node[above right=-1pt] {D}
    -- (5,0) node[above right=-1pt] {E}
    ;
\draw[cyan,dashed,semithick] (0,5)
    -- (.5,5) node[above] {G}
    -- (3,0) node[above right] {H}
    ;

\draw[cyan,dashed,semithick] (5.75,5.25) -- ++(-1,0) node[left,anchor=east] {小聪};
\draw[magenta,thick] (5.75,4.5) -- ++(-1,0) node[left,anchor=east] {小慧};

\end{tikzpicture}

\end{document}
当然,这里有个小难点是如何恰好让「B」点相交,我是做了一些斜率的预计算。放轻松,每一行命令的功能都是比较简单的,你可以注释某行代码再编编译看看结果,相信学会这种绘制并不算太难~
Happy TikZing!
使用chemfig宏包酚醛树脂的缩聚反应方程式如何写,达到图片上的效果,特别是方括号及高分子连线那部分具体是哪里不会呢?看上去是只有方括号和连线没处理好,请展示你现在已有的代码,避免问「do-this-for-me类」的问题。
不是非常优雅的一些暴力微调...
\documentclass{article}%
\usepackage{newpxmath}%
\usepackage{chemfig}
\usepackage{mhchem}
\renewcommand*\printatom[1]{\ensuremath{\mathsf{#1}}}
\begin{document}
\[
    \setchemfig{atom sep=2em}
    \hreac%[hreac debug]
        \^{2pt}$n$\;\chemfig[baseline=10pt]{*6([,0.75]=-=(-[0]CH_2OH)-(-[2]OH)=-)}
        >[{\ce{H+}}][{$\triangle$}]
        \^{2pt}\chemfig{H-[@{op,.5}]([:-30]*6([,0.75]-=-=(-[0]CH_2-[0]@{cl,0}-[0]OH)-(-[2]OH)=))}
        \polymerdelim[delimiters ={[]}, height = 5pt, depth=22.5pt]{op}{cl}
        + $(n - 1)$\ce{H2O}
        \endhreac
\]
\end{document}
Just refer the manual in texdoc nicematrix and a little bit in texdoc tikz:
\documentclass{article}
\usepackage{fourier}
\usepackage{nicematrix,tikz}
\usepackage{lipsum}
\usetikzlibrary{arrows.meta}
\begin{document}

\lipsum[2][1-3]

\[
\renewcommand{\arraystretch}{1.5}%
\begin{pNiceArray}{ccc;ccc}[margin] % new feature `;' in nicematrix v7.7
\CodeBefore%
\tikz{%
    \draw[-Stealth] ([xshift=-1cm,yshift=.05cm]1.5|-2) node[above] {$(-2)$} |- ([xshift=-.5cm]1.5|-2.5);
    \draw[-Stealth] ([xshift=-1.75cm,yshift=.05cm]1.5|-2) node[above] {$(-1)$} |- ([xshift=-.5cm]1.5|-3.5);
}
\Body
1 & 2 & 3 & 1 & 0 & 0 \\
2 & 1 & 2 & 0 & 1 & 0 \\
3 & 2 & 1 & 0 & 0 & 1 \\
\end{pNiceArray}
\]

\lipsum[2][1-3]

\end{document}
@u444 代码要尽量给完整,不要只给一个片段,同时要放在代码块内。
注意到原图其实是想表达3D的角度,原图的展示不符合实际情况,你在评论区中给出的图又完全是2D的,也似乎不完全符合实际情况。
以下是基于luadraw的一个可能方案,可以解决「但是代码不够好看以及视角不够灵活等缺点」,需要自行安装并用lualatex编译:
\documentclass{standalone}
\usepackage[3d]{luadraw}
\usepackage[svgnames]{xcolor}
\usepackage{fourier}
\begin{document}
\begin{luadraw}{name=axis_vector}
local g = graph3d:new{
    window3d={-1,9,-1,9,-1,9},
    window = {-6,8,-5,8},size={12,12},
    viewdir=perspective("xy",0.8,60),
    pictureoptions="every node/.append style={scale=1.5}"
}
local O,delta,P = Origin,-3, M(6.5, 6, 4)
local Pxz = pxz(P)
local Px,Pz,Py = px(Pxz), pz(Pxz), py(P)
local t1, t2, t3 = M(delta, 0, P.z), M(delta,0, 0), M(delta, P.y, 0)

g:Dpolyline3d({{O, 7*vecI}, {O, 7*vecJ}, {O, 7*vecK}}, "-Stealth,solid,black, line width=1pt")
g:Dlabel3d(
    "$x$", 7*vecI, {pos="N",dist=0.1},
    "$y$", 7*vecJ, {pos="W"},
    "$z$", 7*vecK, {pos="E"}
    )

g:Dpolyline3d({{P,Py}, {P,Pxz}, {Pxz,Px}, {Pxz,t1},{O,Pxz}}, "dashed,blue,thick")
g:Dpolyline3d({{O,t2}, {Py,t3}}, "dashed,black,thick")

g:Dpolyline3d({{t1,t2}, {t2,t3}, {Pxz,Pz}}, "Stealth-Stealth,dashed,magenta,thick")
g:Dlabel3d(
    "$z$", (t1+t2)/2, {pos="NW",node_options="text=magenta"},
    "$y$", (t2+t3)/2, {pos="W"},
    "$x$", (Pxz+Pz)/2, {pos="S"}
)

g:Dseg3d({O, P}, "-latex,PaleVioletRed,line width=4pt")
g:Dpolyline3d({{O, 2.5*vecI}, {O, 2.5*vecJ}, {O, 2.5*vecK}}, "-latex,cyan,line width=3pt")
g:Dlabel3d("$\\vec{i}$", 2.5*vecI, {pos="S",node_options="text=cyan"}, "$\\vec{j}$", 2.5*vecJ, {pos="W"}, "$\\vec{k}$", 2.5*vecK, {})

g:Ddots3d({P}, "PaleVioletRed,scale=4", 1.5)
g:Dlabel3d("$P$", P, {pos="NE"},"$\\vec{r}$", P, {pos="W",dist=0.35,node_options="text=PaleVioletRed"})

for _,i in ipairs({Px, Py, Pz}) do
    g:Ddots3d({i}, "blue", 1.5)
end

local configs = {
    {pt=Px, col="blue"},
    {pt=Py, col="green"},
    {pt=Pz, col="violet"}
}
for _, item in ipairs(configs) do
    g:Dpath3d({item.pt, O, P, 3.75, 1, "ca", O, "l"}, "draw=none,opacity=0.2,fill=" .. item.col)
    g:Darc3d(item.pt, O, P, 3.75, 1, "-Stealth,thick," .. item.col .. ",ultra thick")
end

g:Dlabel(
    "$\\alpha$",Z(3.25,1), {node_options="text=blue"},
    "$\\beta$", Z(1.5,3), {node_options="text=green"},
    "$\\gamma$", Z(0.5,-1.2), {node_options="text=violet"}
)

g:Show()

\end{luadraw}
\end{document}
Here below is the proposal of luadraw:
Some details need to be tweaked by yrself.
% https://ask.latexstudio.net/ask/question/8020.html
\documentclass{standalone}
\usepackage[fontset=fandol]{ctex}
\usepackage[3d]{luadraw}
\usepackage[svgnames]{xcolor}
\usepackage{fourier}
\begin{document}

    \begin{luadraw}{name=earth_tilted_system}
        local g = graph3d:new{
            window3d={-8,8,-8,8,-6,6},
            window = {-8,9,-6,6},
            size={10,10}, viewdir={0,80},
            pictureoptions = "line cap=round"
        }
        -- first half plane
        g:Dpath3d(
            {M(0,-7,0),M(-8,-6,0), M(-8,8,0), M(0,7,0),"l", 4*vecJ, "m", Origin, -4*vecJ, 4, 1, vecK, "ca"},
            "fill=yellow!15, fill opacity=1, draw=orange, line width=0.5pt"
        )
        g:Darc3d(4*vecJ, Origin, -4*vecJ, 4, 1, vecK, "teal, line width=0.5pt") -- inner edge
        -- Rotate3d alter the transfoemmation matrix
        g:Saveattr()
            g:Rotate3d(-23.26, {Origin, vecI})
            g:Dcircle3d(Origin, 4, vecK, "fill=yellow, draw=orange, line width=0.5pt")
            g:Dsphere(Origin, 4, {mode=mBorder, edgecolor="cyan", edgewidth=10})
        g:Restoreattr()
        -- second half plane
        g:Dpath3d(
            {M(0,-7,0),M(8,-8,0), M(8,6,0), M(0,7,0),"l", 4*vecJ, "m", Origin, -4*vecJ, 4, -1, vecK, "ca"},
            "fill=yellow!15, fill opacity=1, draw=orange, line width=0.5pt"
        )
        g:Darc3d(4*vecJ, Origin, -4*vecJ, 4, -1, vecK, "teal, line width=0.5pt") -- outer edge
        -- hidden lines
        g:Dcircle3d(Origin, 4, g.Normal, "dashed,cyan,line width=0.8pt")
        g:Dcircle3d(Origin, 4, vecK, "dashed,teal")
        -- Rotate3d alter the transfoemmation matrix again
        g:Saveattr()
        g:Rotate3d(-23.26, {Origin, vecI})
        -- hidden ellipse
        -- g:Dcircle3d(Origin, 4, vecK, "orange,dashed")
        -- the z-axis
        g:Dline3d({-1.5 * vecK, 1.5 * vecK}, "black, dashed, line width=0.8pt")
        -- the rotated y-axis
        g:Dseg3d({Origin, 8 * vecJ}, "teal, dashed, line width=0.8pt")
        g:Dlabel3d(
            "赤道平面", M(0.5,-2,0), {dir={vecJ,M(-8,1,0)},node_options="scale=0.75"}
        )
        g:Restoreattr()
        -- magenta segments
        g:Dseg3d({Origin, 4 * vecJ}, "magenta, dashed, line width=0.8pt")
        g:Dseg3d({8*vecJ, 4 * vecJ}, "magenta, line width=0.8pt")
        -- arc3d
        g:Darc3d(5 * vecJ, Origin, Ms(4,90*deg,23.26*deg),5,1, "red,latex-latex") -- 90*deg = pi/2 (radians)
        g:Darc3d(8*vecJ, Origin, Ms(4,90*deg,(90+23.26)*deg),8,1, "red,latex-latex")
        g:Dlabel3d(
            "黄道平面", M(5,-6,0), {dir={vecJ,M(-8,1,0)},node_options="scale=0.75"},
            "$66^\\circ 34'$", Ms(5,90*deg,(45+23.26/2)*deg), {
                node_options="fill=white,inner sep=1.5pt",
                dir={Ms(1,90*deg,(135+23.26/2)*deg), Ms(1,90*deg,(45+23.26/2)*deg)}
            },
            "$23^\\circ 26'$", Ms(8,90*deg,(90+23.26/2)*deg),
            {node_options="fill=white,inner sep=1.5pt", dir={Ms(1,90*deg,(180+23.26/2)*deg), Ms(1,90*deg,(90+23.26/2)*deg)}}
        )
        g:Dlabel(
            "黄\\\\赤\\\\交\\\\角", Z(8.75,-1.75,0), {node_options="scale=0.8,text=red,align=left,font=\\bfseries\\linespread{1}\\selectfont"}
        )
        g:Show()
    \end{luadraw}
\end{document}
hspan=minimal is all I need, actually...
对文档还是不够熟悉(摇头...)

\documentclass[12pt]{article}
\usepackage[fontset=fandol]{ctex}
\usepackage[showframe,a4paper,hmargin=1.25cm]{geometry}
\usepackage{tabularray}
\UseTblrLibrary{booktabs,varwidth}
\setlength{\parindent}{0pt}
\usepackage{lipsum}
\begin{document}

\begin{tblr}{
    colspec={X[1.25,c,m]X[1.75,c,m]X[1,c,m]X[1.5,c,m]X[1.75,c,m]},
    hlines,vlines,
    hline{1,Z} = {2pt},
    vline{1,Z} = {2pt},
    width=\linewidth,
    measure=vbox,
    hspan=minimal,
    rows = {ht=1cm},
    row{3} = {ht=2.5cm},
    row{X-Y} = {ht=3cm},
    cell{1}{1-Y} = {r=2}{valign=m},
    cell{2}{Z} = {r=3}{valign=m},
    cell{3}{2} = {c=3}{valign=m},
    cell{5-Z}{2} = {c=4}{halign=l,valign=m},
    cell{X-Y}{2} = {valign=h},
}
课程名称 & & {学\quad 分} & & {总计:\qquad 学时} \\
& & & & {\linespread{1.75}\selectfont 讲课:\qquad 学时\\讲课:\qquad 学时\\讲课:\qquad 学时\\讲课:\qquad 学时\\讲课:\qquad 学时\\} \\
{课程性质\\[10pt](请打勾)} & %
{\linespread{1.5}\selectfont%<- important % hete
    通识必修课(\quad)\ 通识选修课(\quad)\ 专业必修课(\quad)\\
    通识必修课(\quad)\ 通识选修课(\quad)\ 专业必修课(\quad)\\
    通识必修课(\quad)\ 通识选修课(\quad)\ 专业必修课(\quad)\\
}
&  &  &  \\
任课老师 &  & 职称 &  &  \\
授课对象 & 年级、专业: &  &  &  \\
课程目标 &  &  &  &  \\
教学重难点 &  &  &  &  \\
% 教材 & {教材:} &  &  &  \\
% 参考资料 & {参考资料:} &  &  &  \\
教材 & {教材:\lipsum[2][1-6]} &  &  &  \\
参考资料 & {参考资料:\lipsum[2][1-6]} &  &  &  \\
其他要求 &  &  &  &  \\
\end{tblr}

\bigskip

Notes: \lipsum[2][1-5]

\end{document}
使用需要lualatex的tkz-elements包(v5.13c)在处理椭圆切线等问题会方便很多:
\documentclass[border=5pt]{standalone}
\usepackage[mini]{tkz-euclide}
\usepackage{tkz-elements}
\directlua{
    init_elements()
    z.O = point(0.15, 0.6)
    C.OW = circle(through(z.O, 0.5))
    z.W = C.OW.through
    z.M = point(-0.25, -1)
    z.N = point(1,4)
    z.C = tkz.midpoint(z.M, z.N)
    L.MN = line(z.M, z.N)
    z.T = L.MN:orthogonal_at(z.C, {length = 1.5})
    CO.EL = conic(EL_points(z.C, z.N, z.T))
    PA.curve = CO.EL:points(0, 1, 100)
    z.P = point(4,-1)
    L.tan, _ = CO.EL:tangent_from(z.P)
    z.Q = L.tan.pb
    L.normal = L.tan:ortho_from(z.Q)
    z.dir = L.normal:report(-1.5, z.Q)
    z.H = line(z.P, z.Q):projection(z.O)
    z.v, _ = intersection(line(z.O,z.Q), C.OW)
    z.u, _ = intersection(line(z.O,z.H), C.OW)
}
\begin{document}

\begin{tikzpicture}
    \tkzGetNodes
    \tkzDrawCoordinates[smooth,thick](PA.curve)  \tkzDrawCircle[black,thick](O,W)
    \tkzDrawSegments[thick,-latex](Q,dir)
    \tkzDrawSegments[thick,add=0 and 0.5](P,Q)
    \tkzDrawSegments[thick,dashed,green](O,Q)
    \tkzDrawSegments[thick,green,-latex](O,v)
    \tkzDrawSegments[thick,dash dot,blue](O,H)
    \tkzDrawSegments[thick,blue,-latex](O,u)
    \tkzMarkRightAngle[size=.25,thick](O,H,Q)
    \tkzMarkRightAngle[size=.25,thick](P,Q,dir)
    \draw [magenta,decorate,decoration={brace,mirror,amplitude=10pt}] (O) -- (H) node[midway,below right,xshift=-.15cm,yshift=-.25cm,black] {$h(K,u)$};
    % labels left is your time~
\end{tikzpicture}

\end{document}
declare function看文档似乎只能允许一元的输出...
如果重复使用这个坐标就要写很多次了,虽然可以复制粘贴,但是不太优雅
我一般的做法是\pgfmathsetmacro:
\documentclass[tikz,border=10pt]{standalone}
\begin{document}
\begin{tikzpicture}
\foreach \ii in {0, 1, ..., 5}{
  \foreach \jj in {0, 1, ..., 4}{
    \pgfmathsetmacro{\x}{\ii+\jj*0.5}
    \pgfmathsetmacro{\y}{-\jj*0.8}
    \node at (\x,\y) {$(\ii,\jj)$};
  }
}
\end{tikzpicture}
\end{document}或者\fpeval?
\documentclass[tikz,border=10pt]{standalone}
\begin{document}
\begin{tikzpicture}
\foreach \ii in {0, 1, ..., 5}{
  \foreach \jj in {0, 1, ..., 4}{
    \def\x{\fpeval{\ii+\jj*0.5}}
    \def\y{\fpeval{-\jj*0.8}}
    \node at (\x,\y) {$(\ii,\jj)$};
  }
}
\end{tikzpicture}
\end{document}利用luadraw还挺简单的,要实现「要求取点多但网格线少」好像也只要改一个参数...
\documentclass{standalone}
\usepackage[svgnames]{xcolor}
\usepackage[3d]{luadraw}
\usepackage{fourier}
\begin{document}
\begin{luadraw}{name=saddle}
local g = graph3d:new{
    window3d={-2,2,-2,2,-2,2},
    adjust2d=true,size={10,10}
}
local f = function(x,y) return 0.3*(x*x - y*y) end
local s = cartesian3d(f, -1.5, 1.5, -1.5, 1.5,{10,10})
-- The function cartesian3d(f, x1, x2, y1, y2 [, grid, addwall])
-- change the parameter grid to get less facets
g:Dboxaxes3d{grid=true}
g:Dfacet(s, {color="Orange", mode=mShaded})
g:Show()
\end{luadraw}
\end{document}
仅作示范,可以画两次,第二次不要画额外的轴:
\documentclass[border=5pt]{standalone}
\usepackage{pgfplots}
\pgfplotsset{compat=1.18}
\begin{document}
\begin{tikzpicture}
  \pgfplotsset{set layers}
  \begin{axis}[
    scale only axis,
    width=10cm, height=6cm,
    ybar, bar width=12pt,
    ylabel={Production (10k tons)},
    symbolic x coords={1-2, 1-3, 1-4, 1-5, 1-6, 1-7, 1-8, 1-9},
    xtick=data,
    ymin=0, ymax=8000,
    axis y line*=left,
    legend style={at={(0.5,-0.15)}, anchor=north, legend columns=-1},
    area style
  ]
    \addplot[fill=white, draw=black] coordinates {
        (1-2, 1149) (1-3, 1744) (1-4, 2314) (1-5, 2905)
        (1-6, 3526) (1-7, 4111) (1-8, 4672) (1-9, 5263)
    };
    \addplot[fill=gray!60, draw=black] coordinates {
        (1-2, 1527) (1-3, 2362) (1-4, 3143) (1-5, 3939)
        (1-6, 4792) (1-7, 5584) (1-8, 6348) (1-9, 7160)
    };
    \legend{Pig Iron, Crude Steel}
  \end{axis}

  \begin{axis}[
    scale only axis,
    width=10cm,height=6cm,
    axis y line*=right,
    axis x line=none,
    ylabel={Growth Rate (\%)},
    ymin=0, ymax=16,
    symbolic x coords={1-2, 1-3, 1-4, 1-5, 1-6, 1-7, 1-8, 1-9}
  ]
    \addplot[mark=square*,thick] coordinates {
        (1-2, 7.1) (1-3, 8.0) (1-4, 6.8) (1-5, 5.8)
        (1-6, 5.6) (1-7, 5.4) (1-8, 5.0) (1-9, 4.9)
    };
    \addplot[mark=triangle*,thick] coordinates {
        (1-2, 13.7) (1-3, 11.0) (1-4, 8.7) (1-5, 8.2)
        (1-6, 9.3) (1-7, 9.5) (1-8, 9.3) (1-9, 9.3)
    };
  \end{axis}
\end{tikzpicture}
\end{document}


问 吕教授经典《概率论与数理统计》、《数值计算方法》beamer 模版与1600 多页课件PDF